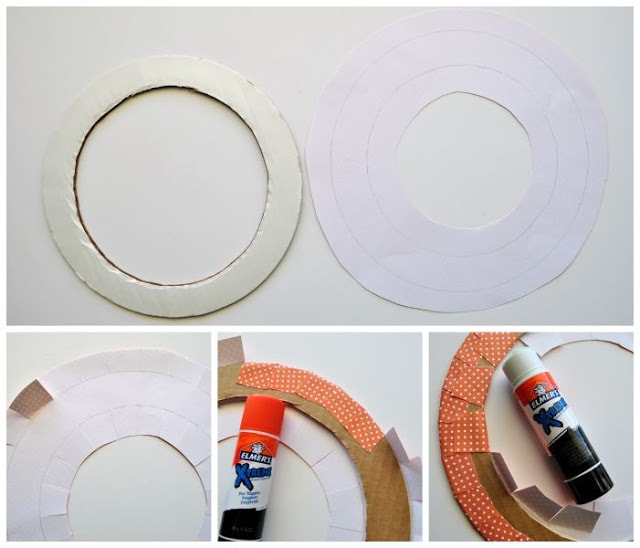
2. Make slits & bend each section
Cut slits around the outside and inside of the circle on your scrapbook paper, stopping the cut where your traced circle is. Lay your cardboard circle onto the back of your scrapbook paper. Bend each section onto your cardboard circle and use your Glue Stick to glue them to the back of your cardboard circle.
3. Bend down sections
After finishing the outside, continue bending down and gluing the sections on the inside of the cardboard circle.
4. Add glue sticks to the circle
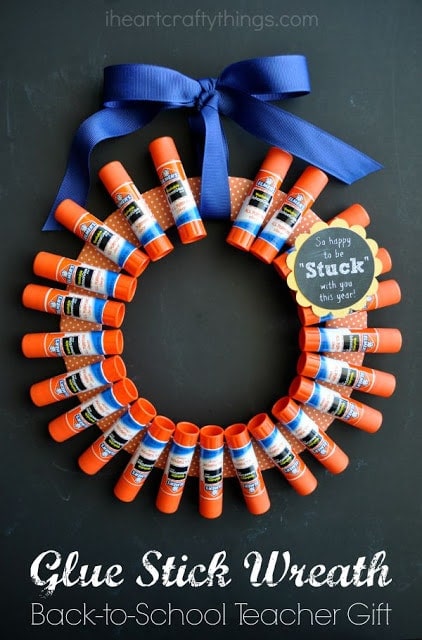
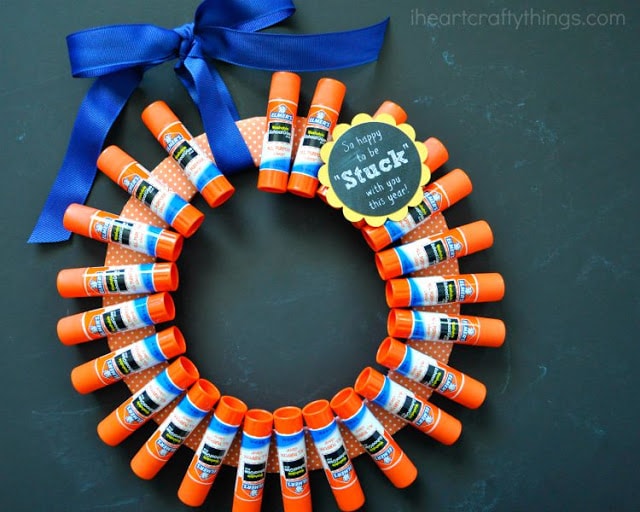
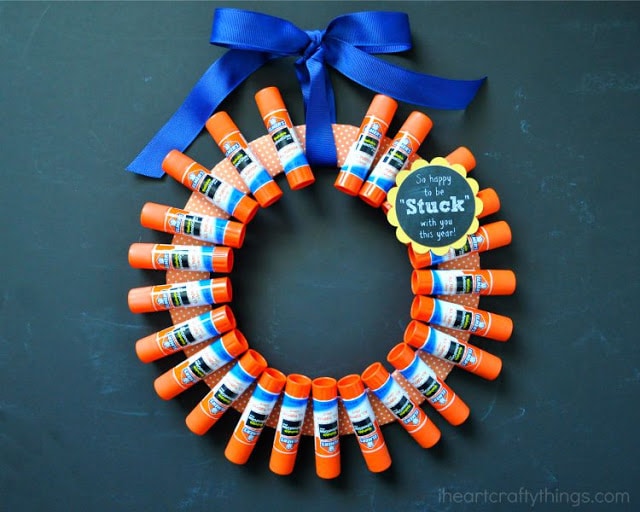
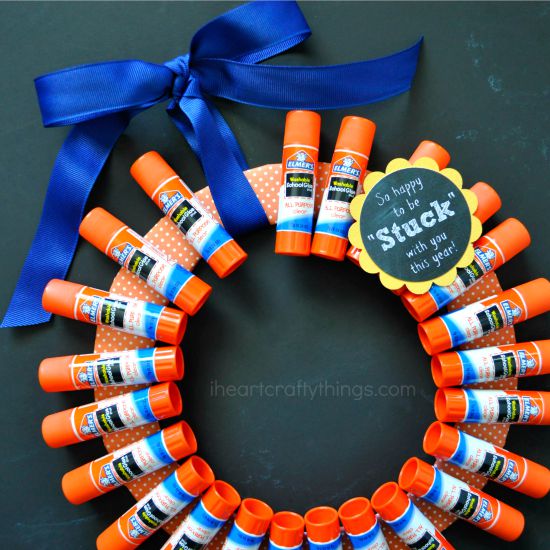
Once your cardboard circle is covered with your scrapbook paper, get out your Glue Sticks and Glue Spots. Put a Glue Spot onto the back of the Glue Sticks and attach them to the cardboard circle. I first glued one on top and bottom and both sides. Then one in the middle of each of the sections, and continued around the circle filling it with the Glue Sticks leaving an open space for a ribbon.
5. Add ribbon & gift tag
Tie a ribbon around the top so it can hang as a wreath. If you would like, print off the gift tag printable and cut it out. We layered it with a yellow scallop shape on the back of it. Attach it to the wreath with a Glue Spot or tape to finish your teacher gift. The little gift tag says ‘So happy to be “Stuck” with you this year!’ It turned out to be such a fun gift. I know my children’s teachers will appreciate how they can display the wreath temporarily and then use the Glue Sticks within the classroom when they are needed.