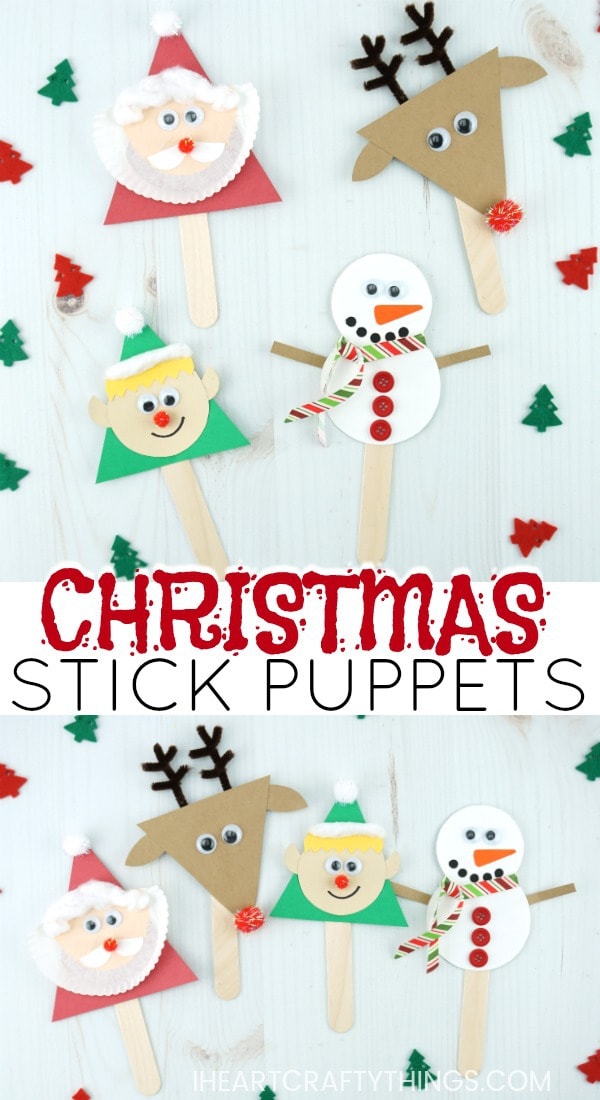
Supplies:
Christmas Stick Puppets Template <—- Get the template HERE wooden craft sticks red, green, brown and white cardstock red and white poms googly eyes white cupcake liner peach paint paintbrush (if using the peach paint) cotton ball buttons ribbon brown chenille stem black marker Glue Dots scissors glue
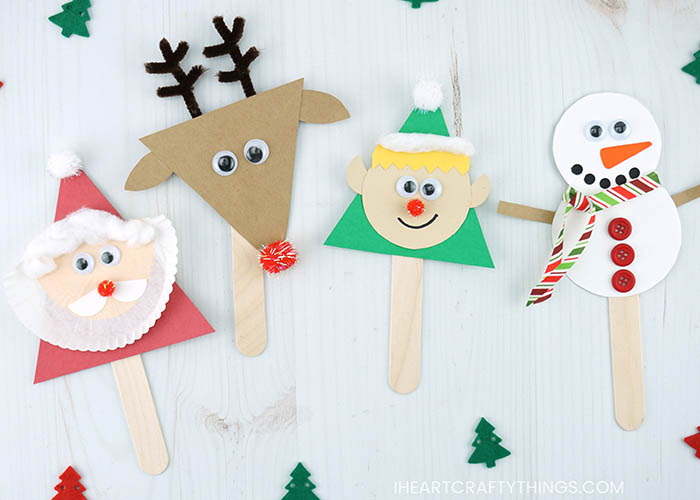
We’ve divided each craft separately below so you can easily follow along with the instructions on how to make each individual craft stick puppet. Make just your favorite Christmas character or make them all.
Santa Stick Puppet Craft
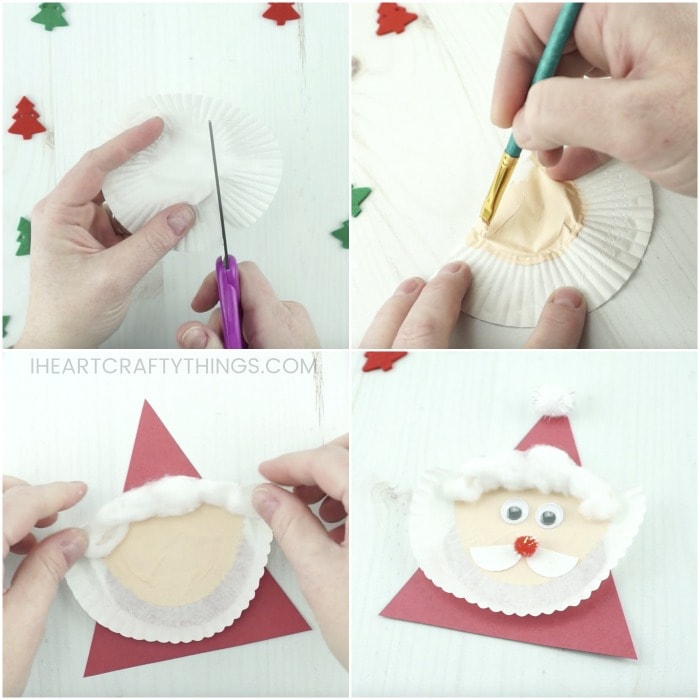
1. Cut off top of cupcake liner
Begin by cutting one-third off the top of a white cupcake liner.
2. Paint inside circle of the cupcake liner
Paint the inside circle of the cupcake liner with peach or tan colored paint. Set it aside to dry completely.
3. Cut out Santa body and mustache
While your paint is drying, use the template to cut out your red triangle Santa body and the white Santa mustache.
4. Glue painted cupcake liner onto red triangle
Glue the painted cupcake liner onto your red triangle, leaving enough room at the top for the triangle hat at the top.
5. Add thin layer of cotton ball
Add a line of glue at the top of the cupcake liner. Then add a thin layer of cotton ball on the glue.
6. Glue googly eyes, mustache and pom-pom’s
Glue your googly eyes, mustache and small red pom-pom nose on your Santa face. Then glue a white sparkly pom at the top of the triangle hat. We used Glue Dots for the pieces so we didn’t have to wait for drying time. They also work well to glue down the pom-poms.
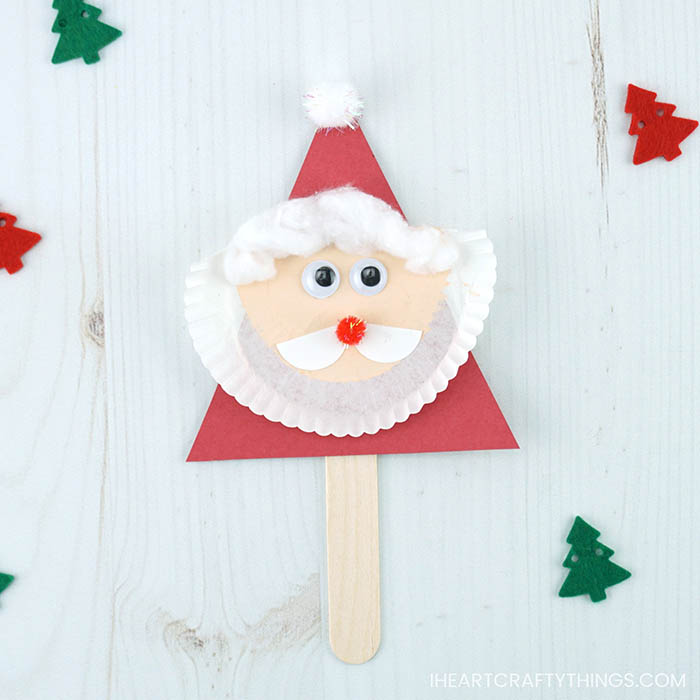
7. Glue wooden craft stick at the back of Santa
Finish your Santa Stick Puppet by gluing a wooden craft stick at the back of the Santa.
Elf Stick Puppet Craft
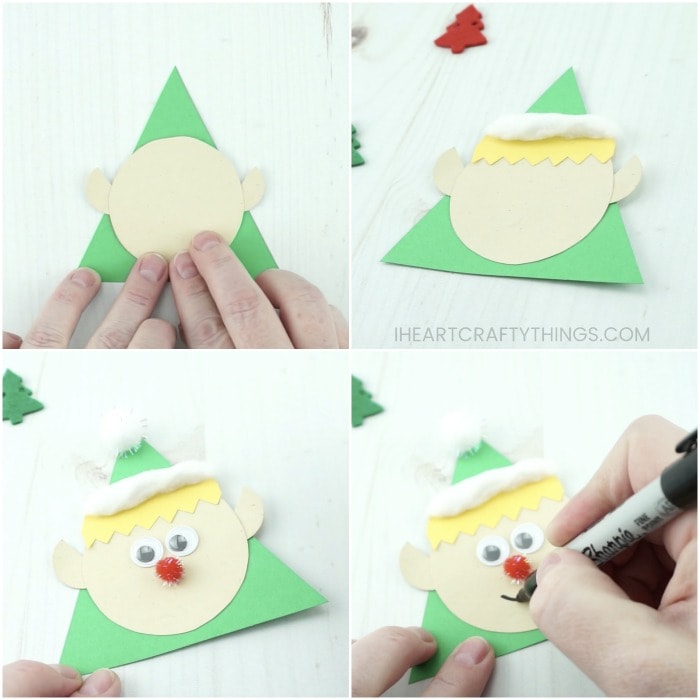
1. Cut out elf body, face and ears
Use the stick puppet template to cut out the elf triangle body on green cardstock and the elf face and ears on tan cardstock.
2. Glue face and ears onto triangle body
Glue the ears on the sides of the elf face. Then glue the face onto the green triangle.
3. Glue hair and thin strip of cotton ball
Cut out some hair for your elf (color of your choice) and glue it at the top of the elf face. Then add a line of glue and thin strip of cotton ball at the top of the elf hair.
4. Add eyes, nose and hat pom-pom
Glue googly eyes and a small red pom on your elf face. Then glue a sparkly white pom at the top of the elf hat.
5. Draw a smile
Use a black marker to draw a smile on your elf stick puppet.
6. Glue wooden craft stick on the back of elf
Finish your elf stick puppet by gluing a wooden craft stick on the back of the elf.
Rudolph the Red-Nosed Reindeer Stick Puppet Craft
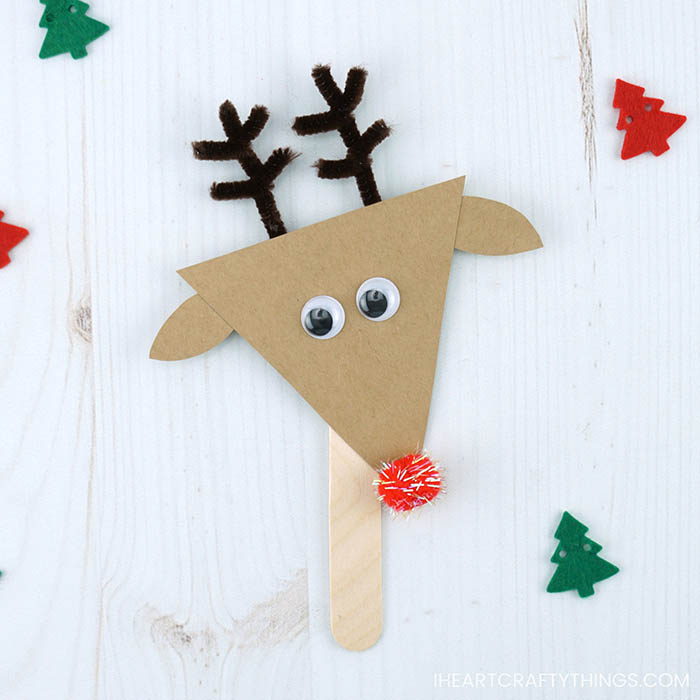
1. Cut out reindeer head, ears and glue ears onto head
Use the craft template to cut out a reindeer head triangle on brown cardstock. Turn the triangle so the tip is at the bottom. Cut out ears from more of your brown cardstock paper and glue them onto your reindeer.
2. Glue googly eyes and nose
Glue googly eyes on your reindeer. Then glue a red pom at the bottom tip of the triangle.
3. Create reindeer antlers
Now create the reindeer antlers. To do this, fold and cut a brown chenille stem in half. You’ll use one-half of a chenille stem for each of the antlers. Fold and cut your chenille stem in half again. Then cut one more of the sections in half. Fold each of the smaller sections around the larger section to make antlers. Do this with the other half of chenille stem as well.
4. Glue antlers on the back of reindeer
Add a Glue Dot on the antlers and glue them on the back of the reindeer.
5. Glue wooden craft stick at the back of reindeer
Finish your Rudolph the red-nosed reindeer stick puppet by gluing a wooden craft stick at the back of the reindeer. We glued it on a bit of an angle.
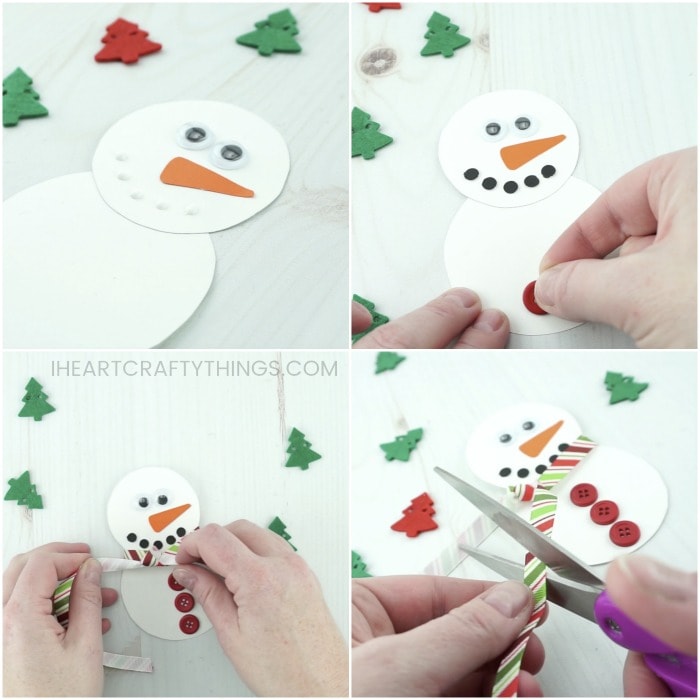
Snowman Stick Puppet Craft
1. Cut out snowman head and body, glue head onto the body
Use the craft template to cut out the snowman head and body section on white cardstock. Glue the head onto the body of the snowman.
2. Cut out nose, glue eyes and nose on the snowman
Cut out a carrot nose from orange cardstock. Glue googly eyes and the carrot nose on the snowman.
3. Create snowman smile
Use a hole punch to punch out several black circles. Add dots of glue under the snowman nose for a smile and add the black circles on the dots of glue.
4. Glue a few buttons
Glue a few buttons on the snowman body.
5. Create scarf
Tie a ribbon around the snowman where the face and body meet. Secure it with a knot to create a scarf. Then trim off any excess pieces of ribbon.
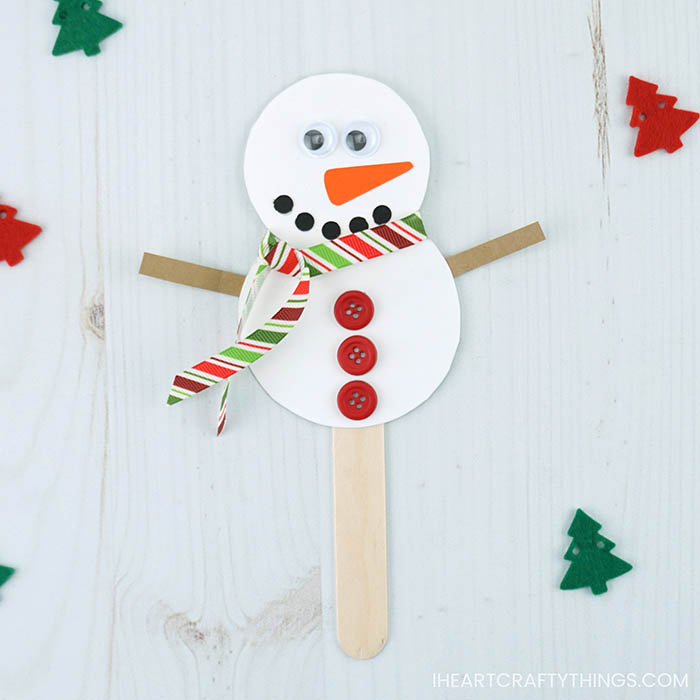
6. Cut out arms and glue them onto snowman
Cut out brown pieces for snowman arms and glue them onto your snowman.
7. Glue wooden craft stick on the back of snowman
Finish your snowman stick puppet by gluing a wooden craft stick on the back of the snowman.
Your Christmas Stick Puppets are complete! Now it’s time for play. Simply hold the end of the craft sticks and use them as puppets. You can make a DIY stage out of cardboard to put on a puppet show. Or hold them as props while singing some of your favorite Christmas songs.