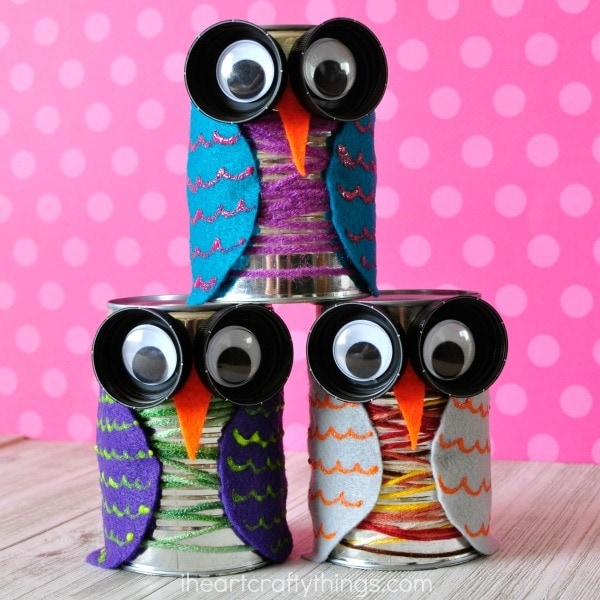
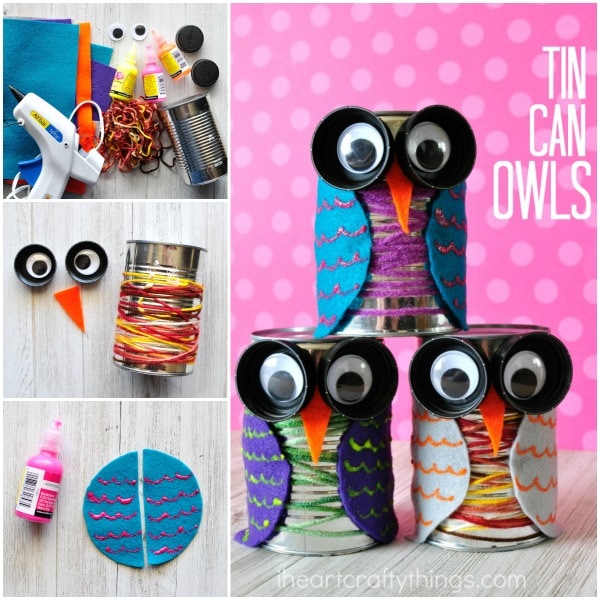
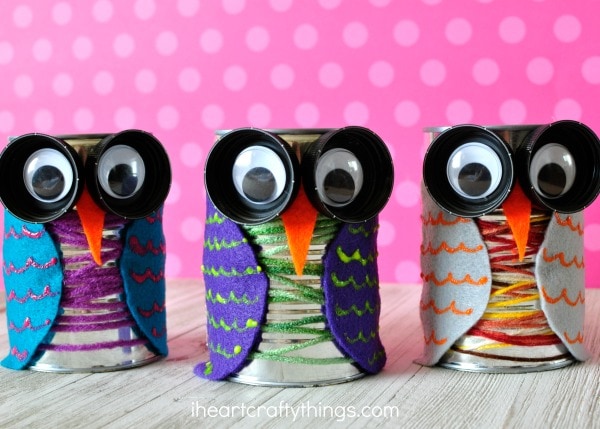
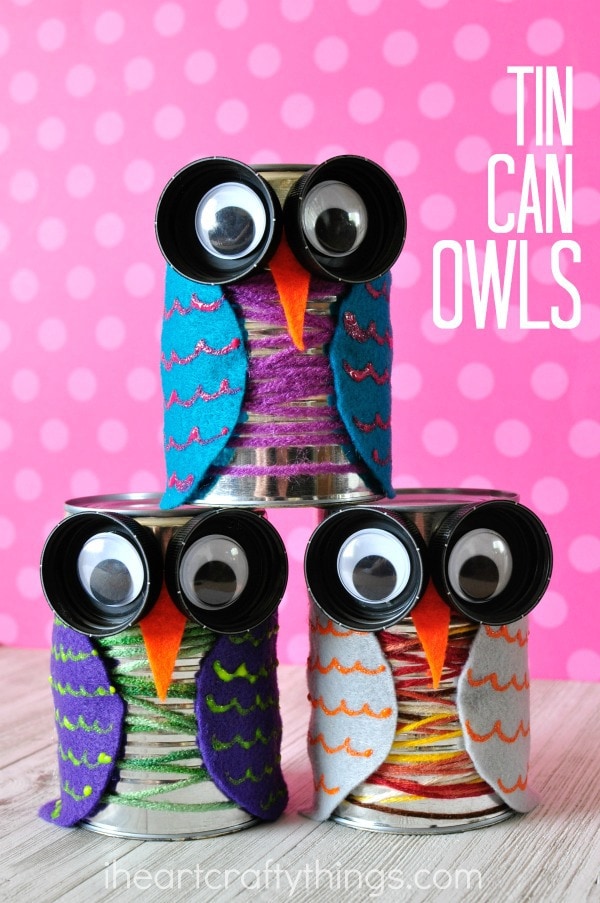
Supplies needed:
– aluminum/tin can (empty and washed out) – craft felt sheets (orange, plus the color of your choice) – yarn – puffy paint – bottle caps – googly eyes – hot glue gun – scissors
Instructions:
1. Wrap yarn around tin can
Gather your supplies. Start by cutting off a long strand of your yarn and wrap it around your tin can to give your owl some extra texture and color. Heat up your hot glue gun and glue the ends of your yarn onto the back side of your tin can.
2. Make wings
Trace a circle on your craft felt sheet with a pen and cut it out. Then cut the circle in half. We used the lid of a peanut butter jar for our circle. It was the perfect size. Use your puffy paint to draw squiggly feather designs onto your felt pieces. Let them dry completely.
3. Add eyes & beak
Cut a triangle beak out of your orange craft sheet. Then use your hot glue gun to glue your googly eyes into the inside of your bottle caps.
4. Assemble your owl
Once your felt wings are dry, you can assemble your owl together. Glue your felt wings onto the sides of your tin can with your hot glue gun. Then glue on your orange, felt beak and lastly your big owl eyes. We made these owls with the bottom side up so it’s closed, but you could reverse it leaving the open end up and use this adorable tin can owl craft for a pencil or pen holder.