In fact, I’ve been so excited to share it with you ever since we made it. My daughter and I had an afternoon full of fun making our colorful butterfly craft and they’ve been such a delight for my daughter to fly and play around with.
Read through the easy step-by-step instructions below to get started making your own colorful butterflies.
Supplies needed to make a Wood Peg Doll Butterfly:
This post contains affiliate links to the products mentioned. Read our full disclosure policy for more information.
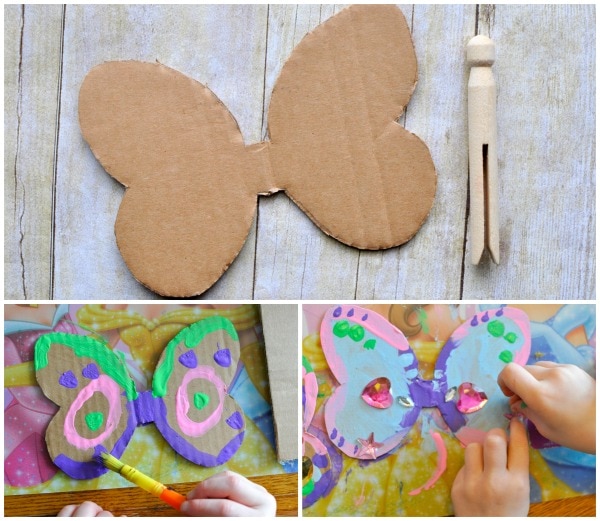
2. Paint butterfly wings and slide wood peg doll down onto them
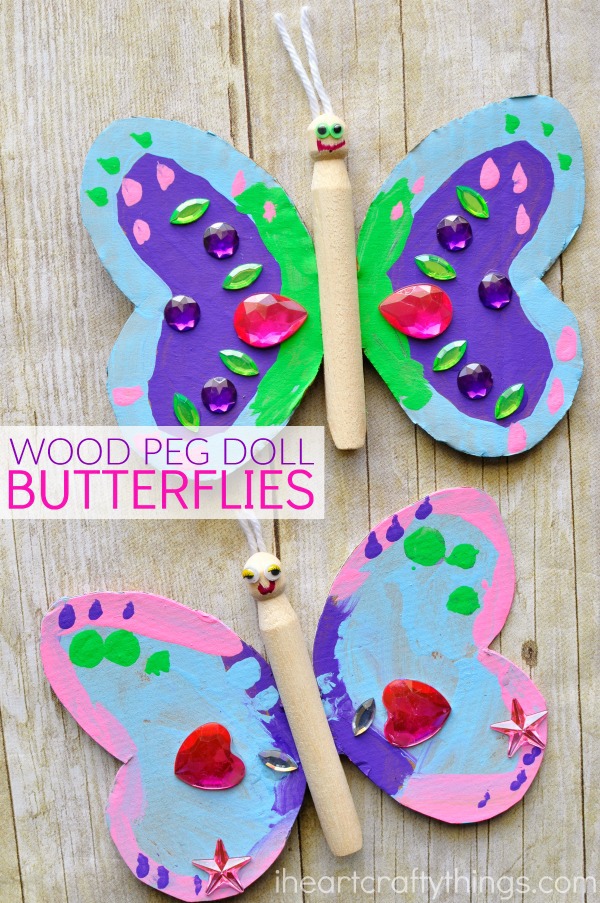
Paint your butterfly wings. Let them dry completely. When they are finished drying, slide your wood peg doll down onto your wings.
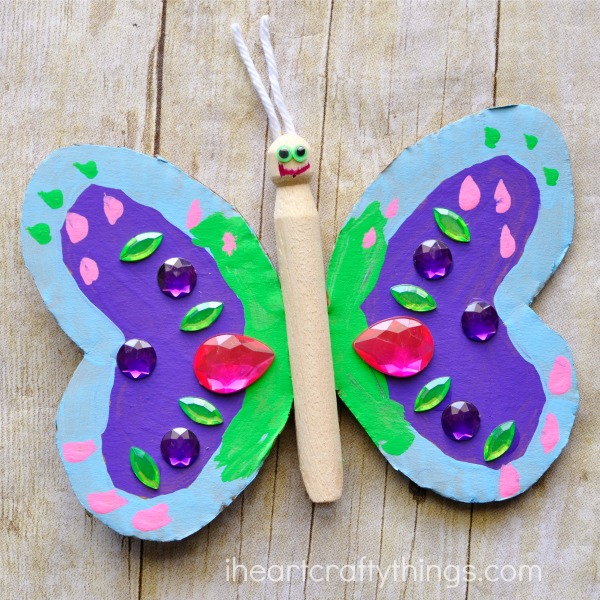
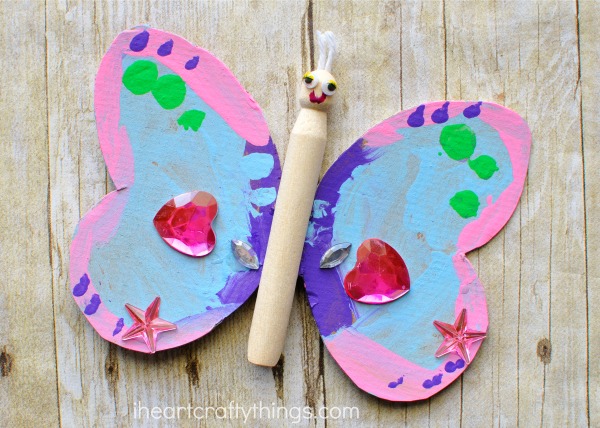
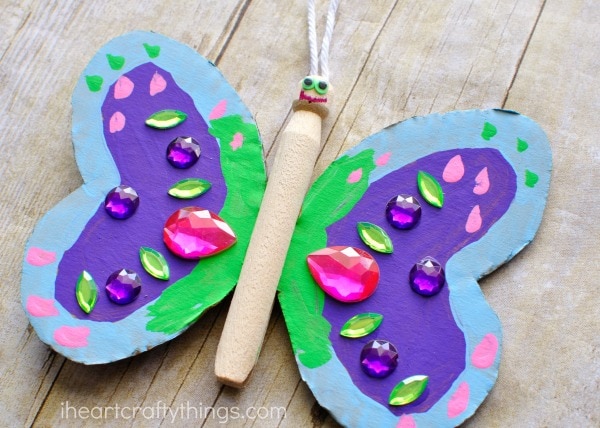
3. Decorate wings with gems
Glue craft gems onto your butterfly wings. My daughter and I had a ball looking through all of the different colors, shapes and sizes of all of the gems while our butterfly wings were drying. We created all kinds of different patterns to decide what we wanted to put on our butterfly wings.
4. Add antennae, googly eyes, draw a mouth
Cut a piece of string for your antennae, bend it in half and glue it onto the back of your butterfly head. Then glue on your googly eyes and draw on a mouth with your red or pink marker.