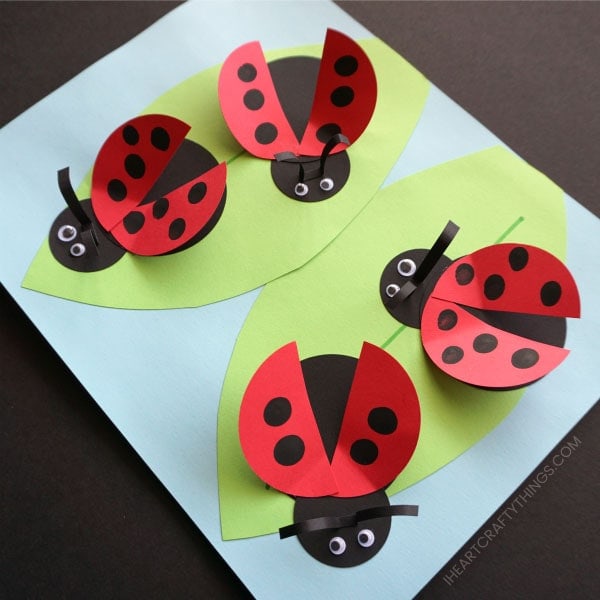
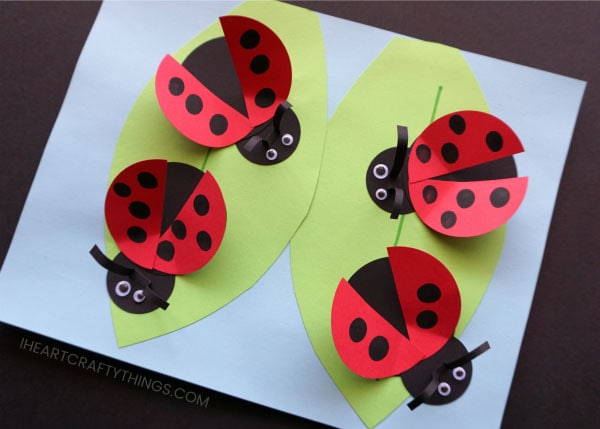
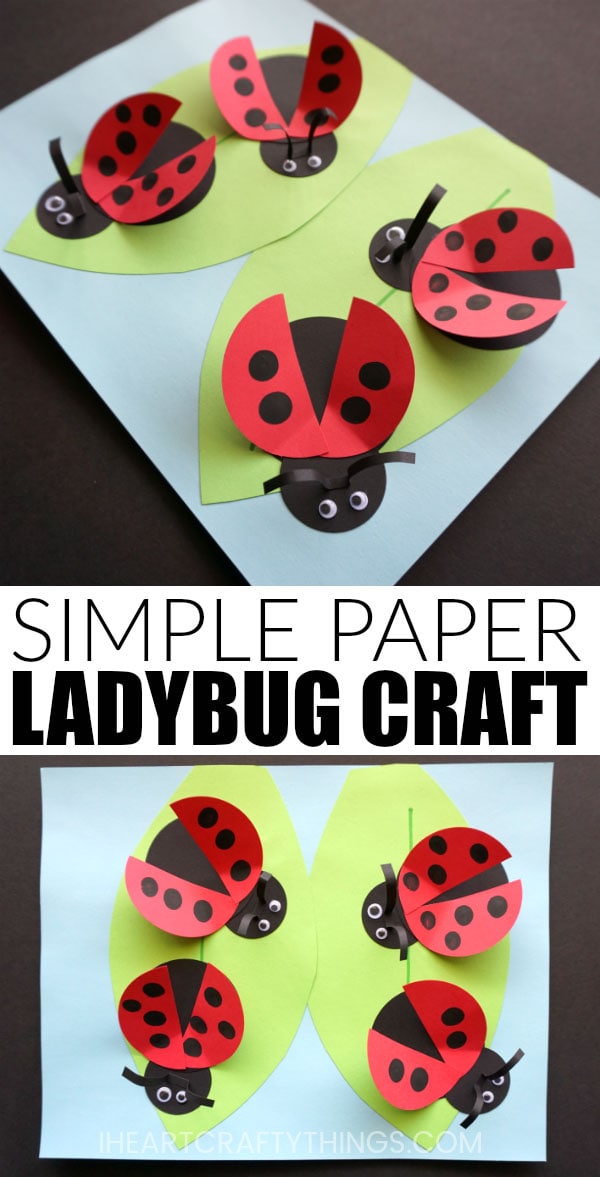
The fingerprint spots on the ladybug wings gives this fun spring craft a personal touch. Kids will also adore how we made the wings pop off the page as if the ladybugs are in flight. With only a few supplies and a morning or afternoon of crafting fun, you will have this darling paper ladybug craft finished in no time at all.
Supplies needed:
light blue, green, red and black cardstock black paint small googly eyes green marker 3-inch circle punch (optional) 2-inch circle punch (optional) scissors glue
Instructions:
1. Prepare 4 red circles
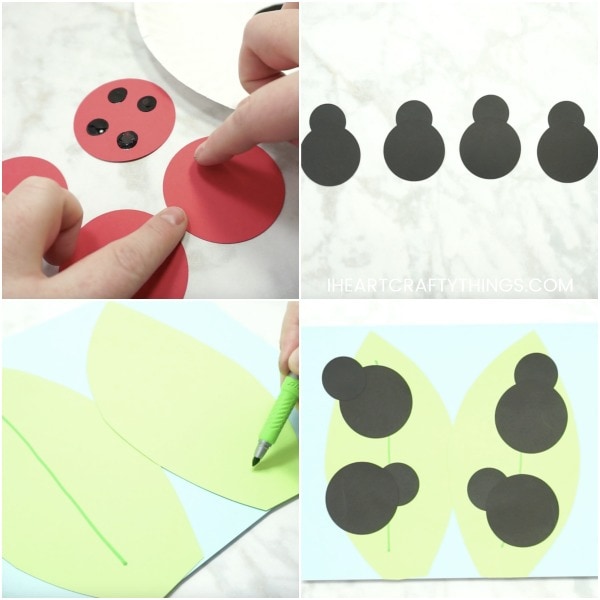
Cut out four, 3-inch circles from your red cardstock paper. Add a small amount of black paint onto a small dish or paper plate. Dab your finger into the black paint and print it onto a red circle to make ladybug spots. Add as many or as little dots as you’d like. Add dots to all four red circles. Set them aside to allow the paint to dry.
2. Cut out ladybug body
Cut out four 3-inch circles and four 2-inch circles from your black cardstock. Glue the smaller circles onto the larger circles to form ladybug bodies.
3. Make the leaves
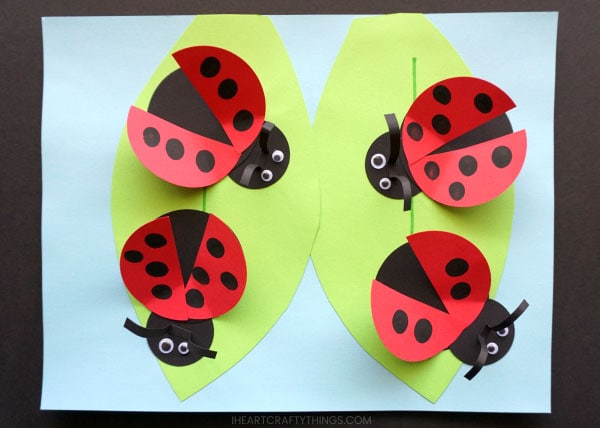
Cut two big leaves out of your light green cardstock. We found it easiest to cut our green cardstock in half and then cut a leaf out of each half sheet of paper. Glue the leaves onto your light blue cardstock. Then use a green marker to add a line down the middle of each leaf.
4. Glue bodies & eyes to the paper
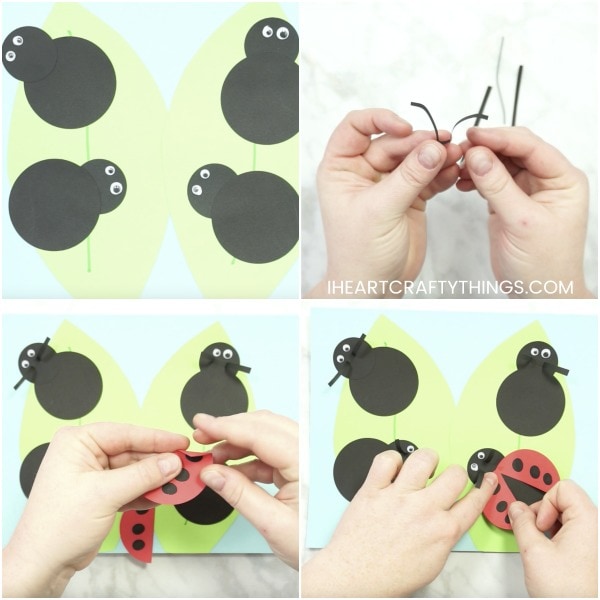
Glue the four ladybug bodies onto the leaves of your paper. Then glue googly eyes onto the face of the ladybugs.
5. Make antennae
Cut four small strips from your black cardstock. Bend the strips into an antennae leaving a flat base in the middle of the antennae. Add some glue to that flat base in the middle of the antennae and glue it onto the face of the ladybug behind the googly eyes.
6. Glue wings to the craft
Once your black paint spots have finished drying, it’s time to create the wings for your paper ladybug craft. Cut the red circle in half. Bend down a small section at the top of the half circle, add glue to it and glue it down on top of the ladybug body. Repeat with the other half of the circle. Then do this with the remaining three red circles.
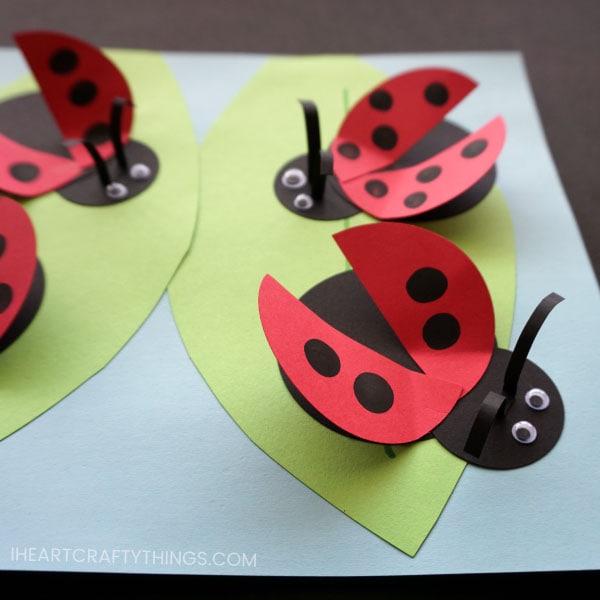
Your paper ladybug craft is complete!
Leaving the back half of the ladybug wings unglued from the paper gives the ladybugs a fun 3D effect looking as if the bugs are getting ready to land or take flight off of the leaves. For additional details, you can use a black marker to add legs to all of your ladybugs.