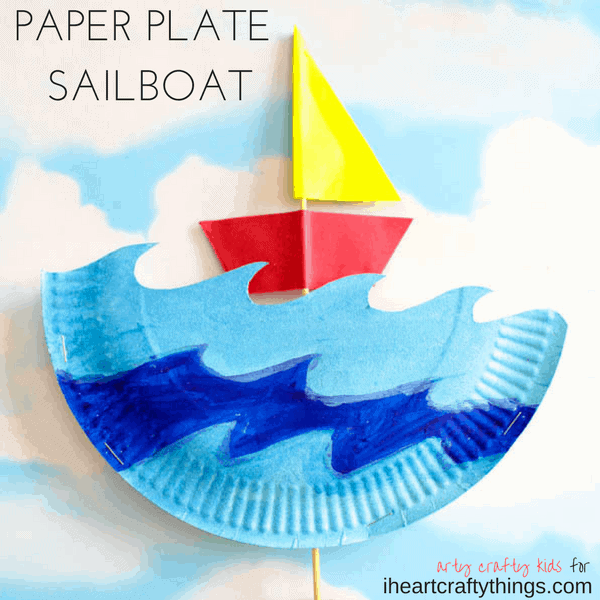
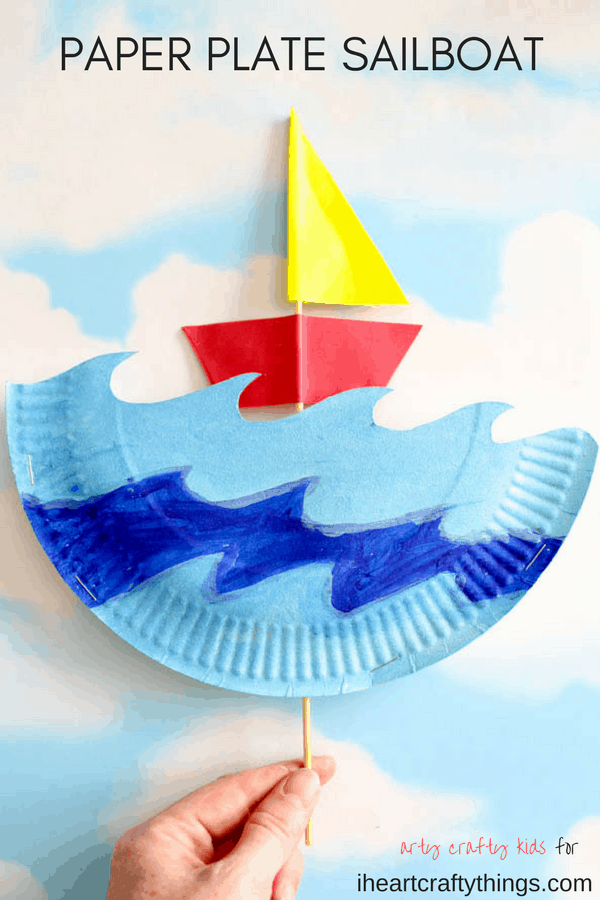
So if you’ve been to the beach recently, planning to go or are simply looking for a fun and interactive Summer craft to try with the kiddos, then you will love our paper plate sailboat craft.
Kids will be unable to resist the lure of singing ‘Row Row Row your Boat’ as their sailboats cross the paper plate sea. As their boats tackle the waves, with a swift spin their boats will turn around and start all over again to continue the fun. This is a great little craft for encouraging play and with a small addition of a skull and cross bones, these sailboats could be easily transformed into pirate ships too! This post contains affiliate links to the products mentioned. Read our disclosure policy for more information.
Supplies Needed to Make this Paper Plate Sailboat Craft
a single paper plate light blue and blue paint two sheets of colored paper a skewering stick (with the point removed) school glue scissors stapler
Instructions for this Sailboat Paper Plate Craft
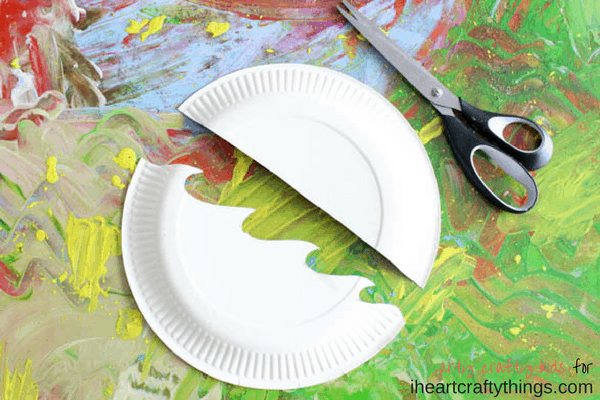
1. Cut paper plate in half and shape some ‘waves’ into one edge
Begin by cutting the paper plate in half and shaping some ‘waves’ into one edge. For guidance, draw the waves first with a pencil.
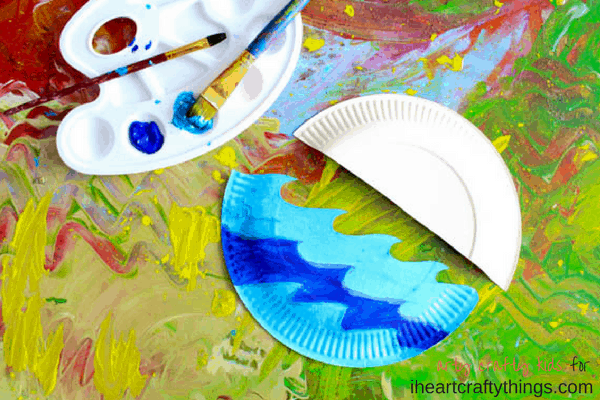
2. Paint paper plate
Paint the paper plate blue. As you can see, we’ve added some deep sea depth with a darker tone of blue to create the appearance of ‘waves’.
3. Staple paper plates together
Once the paint has dried, staple the paper plates together leaving plenty of space at the bottom of the plate for the boat to be moved via the stick (skewer).
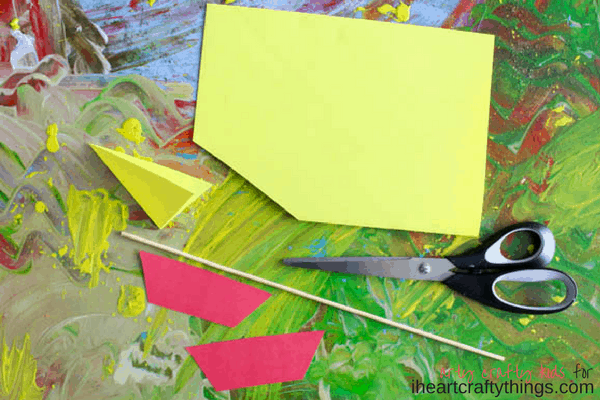
4. Cut out a triangular sail shape
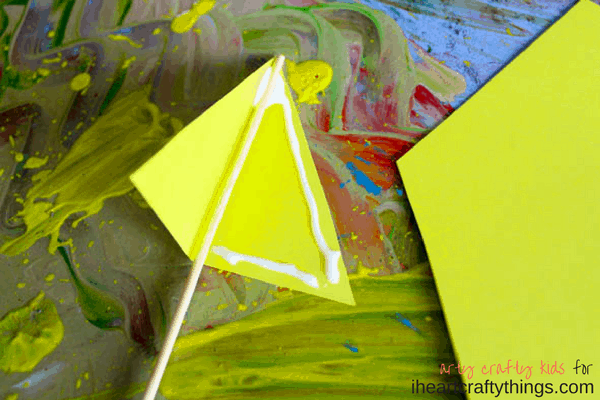
Fold a piece of colored paper in half and at the fold, cut out a triangular ‘sail’ shape.
5. Glue folded triangle with the skewer in it
Open up the triangle and place the top of the wooden skewer along the fold. Add glue and fold the triangle over, pressing along the skewer and edges to ensure the sail is securely glued together. This will prevent the sail from swiveling around.
NOTE: While we’ve used a skewer for the mast, this could be replaced for a straw or a straight wooden stick from outside. Whatever you choose to use, make sure the stick is long enough to accommodate a boat and has space for your child to handle the stick at the bottom of the plate.
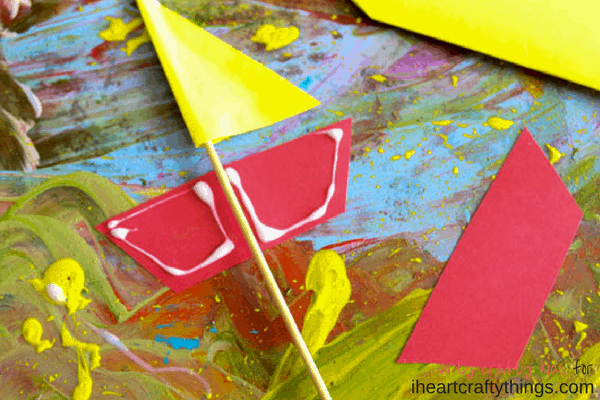
6. Cut out two boat shapes
Fold the second piece of paper in half ( using an alternative color) and cut out a ‘boat’ shape. This time, do not cut along the fold as we’re looking for two separate symmetrical shapes that can be stuck together.
7. Glue boat shapes together and press around the skewer
Like the sail, glue the paper together to create a boat and press around the skewer to ensure the paper fits snugly without movement. And now for the really fun bit! Place the stick between the paper plates and begin sailing! Your Paper Plate Sailboat Craft is now finished!