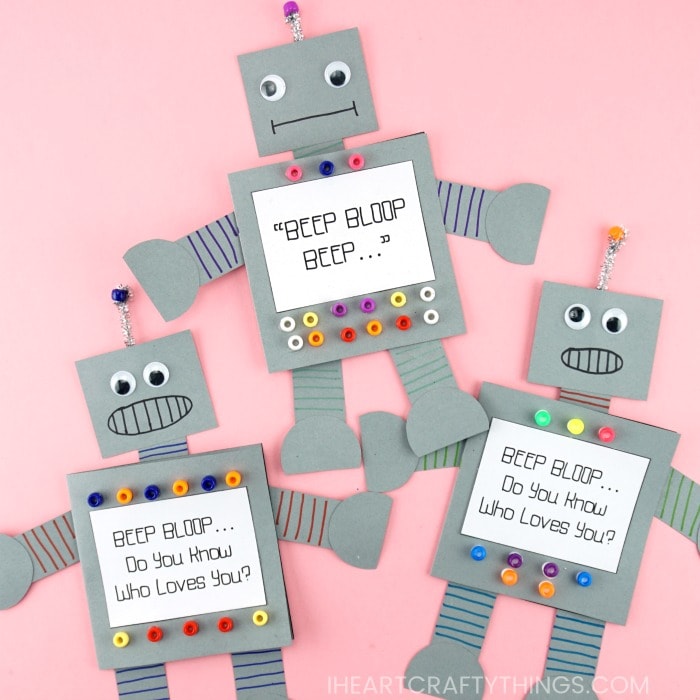
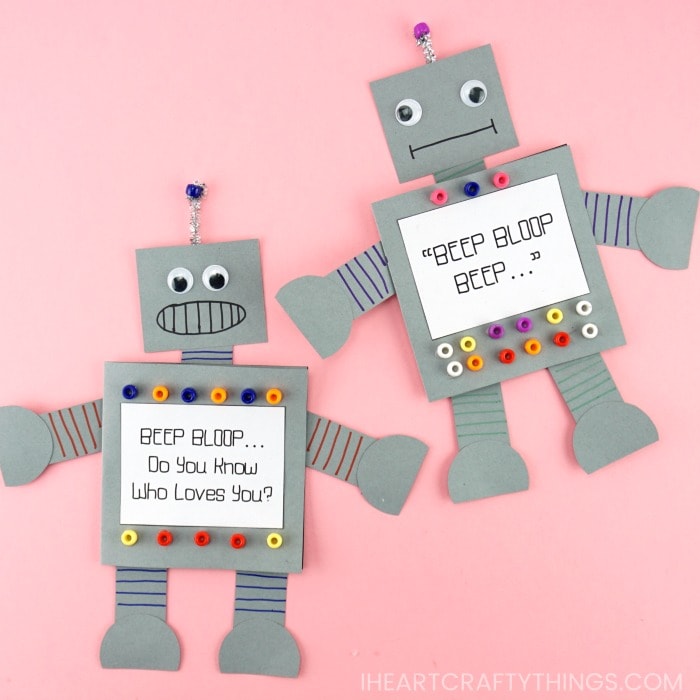
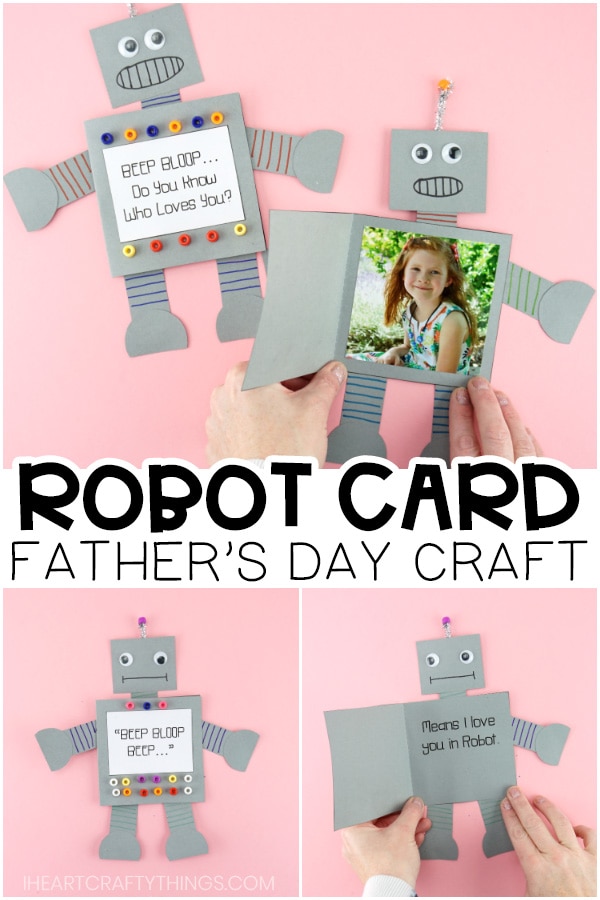
Robots are such a cute theme for crafting any time of the year. We designed this fun robot craft around Father’s Day but the adorable message on the inside of the card could be used for Mother’s Day, Grandparent’s Day or for giving to any one you love all year long.
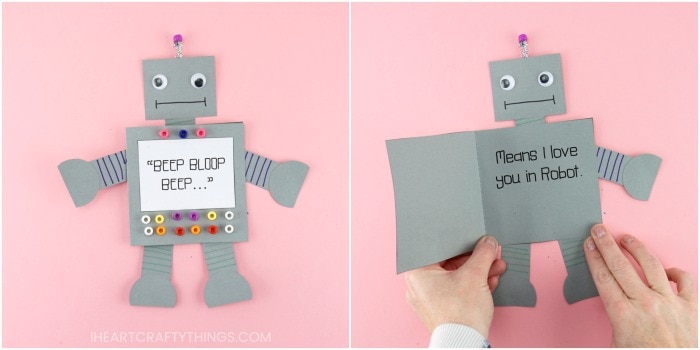
We have two different options for making this adorable robot card. In the first option the outside of the paper robot says “Beep Bloop…Do you know who love you?” in a robot text and a photo of a child is glued on the inside of the card for a special surprise for Dad or grandpa. The added photo definitely makes the paper robot a keepsake to treasure forever. The second robot card option says “Beep, Bloop Beep…” on the outside of the card. Inside the cute saying is finished with “Means I love you in Robot.” Either option is sure to make the recipient’s heart melt!
This post contains affiliate links to the products mentioned. Read our disclosure policy for more information.
Supplies needed:
Robot Father’s Day Card template <—- Get the template in our shop Gray cardstock 8.5-inches by 11 inches White cardstock 8.5-inches by 11 inches Child of photo, 4-inch by 4-inch size (Optional- depending on which card template you use) Googly eyes Pony Beads Chenille stem Markers Scissors Glue Stick Tacky Glue Tape
Instructions:
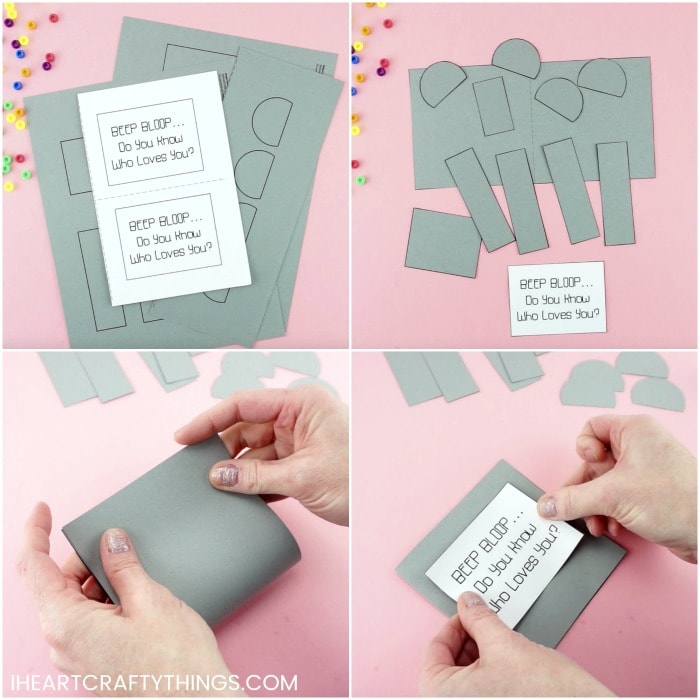
1. Print out template
Purchase and download arobot Father’s Day card template. Choose which version of the robot card you want to make and print out the template pages needed on cardstock paper. At the top of each page of the template you will find notes in the upper left corner of what color to use for printing each page.
2. Cut out pieces
Cut out each of the pieces of the template.
3. Fold the card piece
The rectangle card piece of the template has a dashed line down the center of the card. Fold it in half along the dashed line to make your folded card.
4. Glue text piece
Glue the text piece on the front of your folded card.
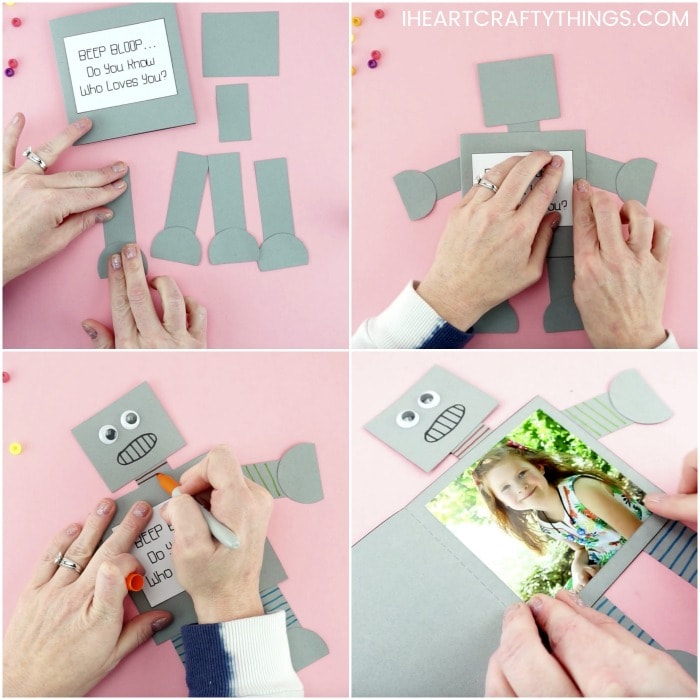
5. Glue all body parts together
Use a glue stick to glue the robot hands and feet onto each of the arms and legs. Then glue the robot head onto the neck. Finally, glue the arms, legs and head onto your robot card.
6. Add face details
Add googly eyes on your robot face. Then use markers to add details to your robot (i.e., mouth, lines on arms, legs and neck).
7. Glue photo on the inside of card
If using the template for a child’s photo, glue the 4-inch by 4-inch photo on the inside the robot card.
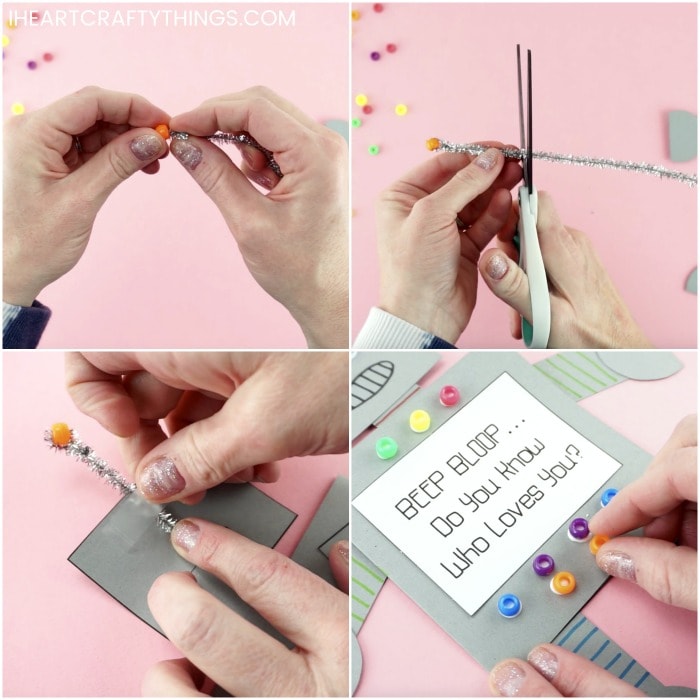
8. Make antennae and attach it to the robot head
Make the antennae for your robot. Place a pony bead onto the end of chenille stem. Fold the end of the chenille stem down and twist it around itself to secure the pony bead onto the end. Trim the antennae to the length of your choice. Then tape it onto the back of your robot head.
9. Add pony beads
Add dots of Tacky Glue on the front of your robot card and then add pony beads on the glue. These take on the look of buttons on the front of the robot. To add an extra personal touch to your paper robot craft, children can write a personal message on the inside of the card to the recipient.