Supplies needed:
Tutorial:
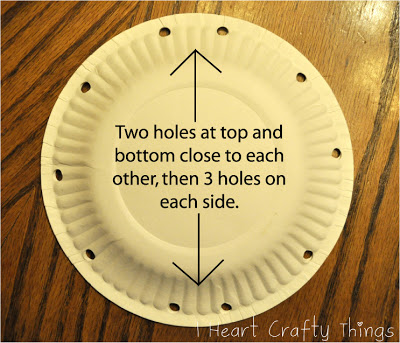
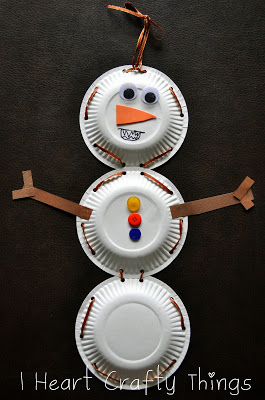
1. Punch holes in the paper plates
2. Lace paper plates together
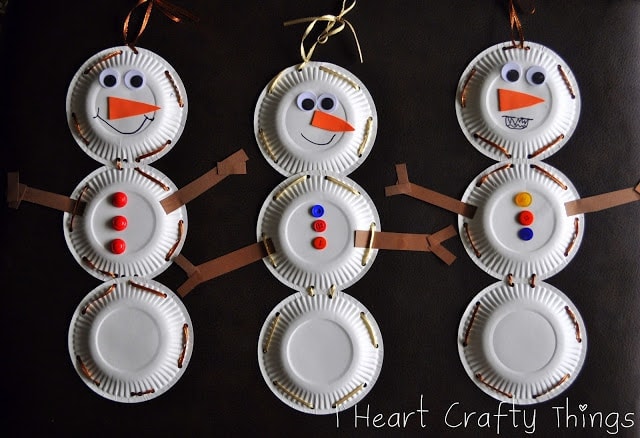
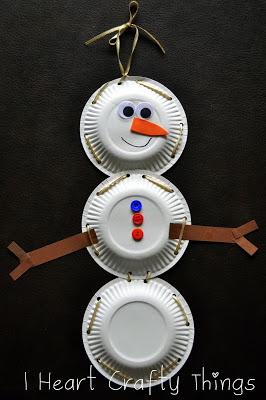
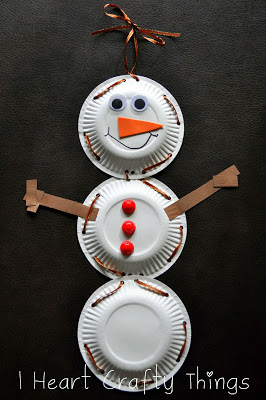
Start lacing one of your paper plates starting at the top and lacing down to the bottom (only lacing half of the plate). When you get to the bottom hole, start lacing on your second plate in the same manner and continue onto your third plate. When you get to the bottom of the third plate just continue lacing all the way around the plate, and then back up to the second plate and ending at the top of your first plate. It sounds a bit confusing, but hopefully you understand by looking at the pictures. To make this craft easier for kids you could lace each individual plate and then staple them together.
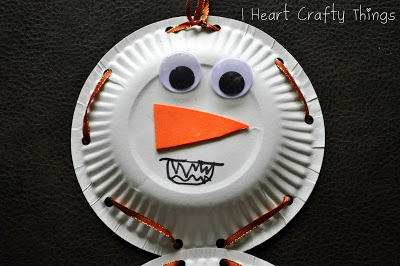
3. Glue all snowman face details
After lacing the snowman together, glue on your large googly eyes, a carrot nose cut from an orange foam sheet or orange paper, buttons, and brown paper twig arms.
4. Draw a smile
Finish your snowman by drawing on a smile with a black marker. Since my youngest is a toddler, I guided her in lacing her plates together and I put dots of glue on the plates for her to add all of the pieces herself. I also helped her hold the marker to guide her in drawing the smile on her snowman. This is only her second project but if you have a toddler who regularly crafts, I’m sure all of this would be simple for them. I love seeing the different personalities of my kids’ snowmen. My 5 year old wasn’t happy with how his original smile turned out on his snowman so he decided to make his the “abominable snowman”. Haha!